
I’m pretty sure it happens to everybody who has ever wanted to make a DVD. You launch your favorite DVD authoring software, pick a menu that you like, burn the disc, and it looks great. Until tomorrow, when you pop in your favorite action flick. Then you are faced with a professional DVD menu that makes you wonder why you even liked your DVD. Well, the time has come to end your suffering, as I show you how to create a DVD menu that you will be proud of.
First, a list of materials. You’re going to need the following:
- iDVD. I use iDVD ’08, and I’m not sure how these tips will work in previous versions or in other DVD authoring software.
- Video editing software. You could do this in iMovie, but for best results, you’ll want something that can work in layers, like Final Cut Express.
- Photoshop. Or a similar image editing application.
Choose a Theme to Modify
 Okay, here we go. Fire up iDVD and click the button for themes. Go to the popup menu at the top to the theme list and pick Old Themes. If you don’t have the old themes, don’t worry. iDVD ’08 includes all of the old themes for previous versions on the install DVD. Simply insert the disc and follow the instructions for installing the themes.
Why do I want old themes instead of the flashy new ones? The new themes all have drop zones, which cannot be deleted. Because of this, we’ll choose an old theme that has no drop zones, then make our own DVD background. Pick something like “A Day to Remember” or “Holiday Cheer” from the old themes collection.
Create Your Menu Background
We’ll leave iDVD now and launch Final Cut. This is where we will be creating our fancy menu background. As far as this step goes, you’re on your own. I don’t know what you want your DVD menu to look like, so I can’t tell you how to make it. What I can do is tell you how I built my DVD menu, which will give you some general guidelines.
I wanted to add an intro to my DVD, like the ones that you see on pro DVDs all the time. You know, where little bits of the movie swoosh around on the screen, culminating in the DVD menu. This is actually easier to create than it looks, but it involves some extra work with the background music.
You’ll need to pick some music that has a pause in it and add a marker at the pause. This marks the end of your intro. The rest of the music will loop on the DVD menu.  Now build your DVD menu, using keyframing effects to make stuff swoosh around on the screen. For my DVD I decided that I would just fade through some important lines in the movie, and then swoosh in a logo and menu.


Many menus on professional DVDs will have a little video in one corner that shows memorable moments from the film. To create this, find the clips you would like to use, and then add them to your menu project.
In Final Cut, double click one of the clips. This brings it up in your viewer. 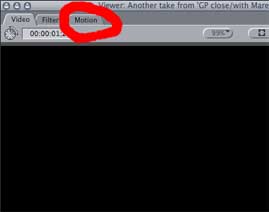 Now go to the motion tab in the viewer.
  This brings up a whole set of controls that allow you to scale, rotate, and position your clip. Play with these settings until the clip is where you want it on the screen, and then write down what you did, so that you can apply the same effects to the rest of the clips. I scaled mine down 30%, and then dragged the clip to the position I wanted to get the center point coordinates for the rest of the clips.
Keep in mind that you need to leave room for the navigation buttons. I added a translucent bar with a sword behind it to the bottom of the screen. This effectively created an area where I could put the buttons.
Well, I hate to leave you in suspense, but this article is getting rather long, so I’ll just leave you with that for now. Have fun creating your menu, and tune in next week for the exciting conclusion!